Labels Below a Moulded Bottle Logo: Can Your Packer Hold the Position?
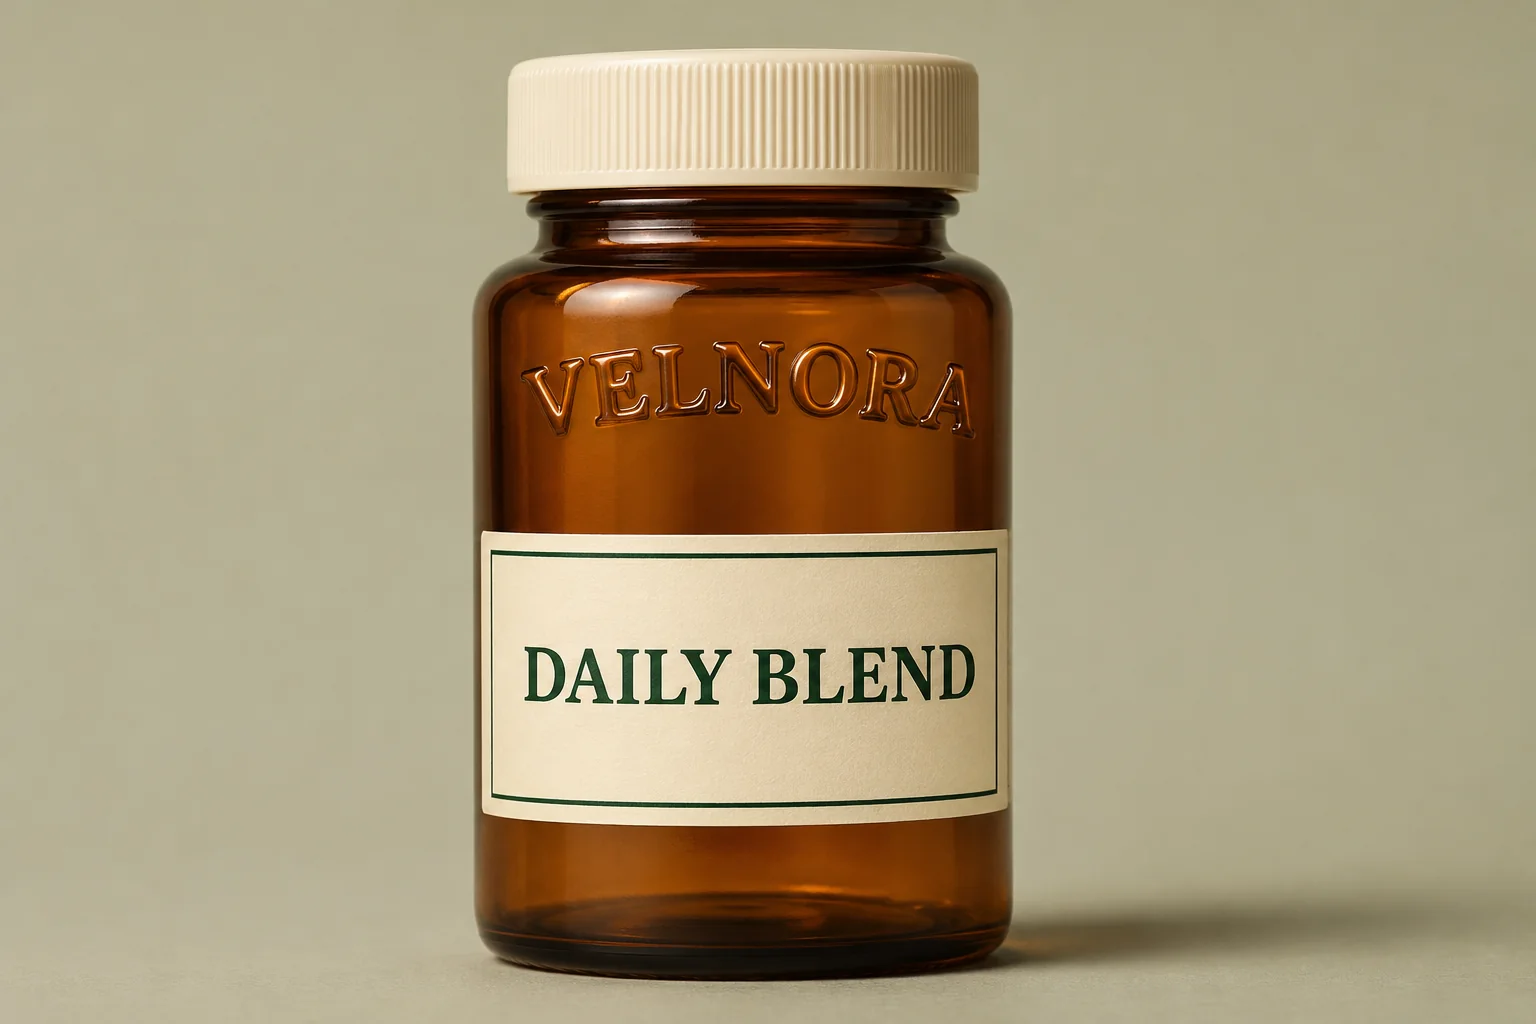
Keep a printed label below a moulded bottle logo when that leaves enough space for the approved information and the packer can hold the intended position. Before choosing the dieline, decide whether the printed front panel needs to stay centered under the glass mark. That relationship requires control of the bottle’s rotation as well as the label’s height. A front-view rendering can show the intended result while leaving that application question open.
Start with the actual bottle and the person or company that will apply the labels. A small hand-labelled launch may support a different layout from a routine machine run. Ask the packer how it will find the intended front of each bottle and how it will assess placement before you commit to printed stock.
Give the moulded mark a place in the brief
Set the bottle upright and identify the feature the shopper should see. It might be a raised wordmark, a crest or recessed lettering. Mark the intended viewing direction on a bottle drawing or a face-on photograph. Add a horizontal reference from the base and a vertical reference through the feature. Use those same references when discussing the label with the printer and packer.
Chandler Glass and Packaging’s bottle design guidance distinguishes raised embossing from recessed decoration. It also explains that locating a body label relative to such a feature can require bottle-positioning provisions matched to the labelling equipment. Its examples concern wine bottles. Use the principle to frame a question about your supplement bottle, then ask the packer to confirm the method for the particular container you intend to use.
Measure the smooth area available for the proposed label. Mark where the glass feature begins, where the shoulder and heel turn, and any seam, rib or recess nearby. Obtain the container drawing and revision where available. If bottles come from more than one source or have an approved range of variation, bring that information to the review. A label outline fitted to one carefully selected specimen can leave the wider supply unresolved.
Compare three ways to keep the brand visible
Begin with the simplest layout that carries the buyer-approved information clearly. The printed label might sit below the mark, wrap around it with an agreed open area, or serve an independent panel whose front position is less critical. Each changes the artwork and application task. The recessed panel guide addresses the contact question if the intended label area itself has a rim.
| Proposed route | What to check before ordering |
|---|---|
| A smaller label centered below the moulded mark | Place an actual-size paper outline below the feature. Confirm usable information space, the gap and the packer’s way of controlling both height and rotation. Hold if the printer or packer lacks the agreed reference. |
| A shaped label or open area around the feature | Mark which regions retain label material and which stay bare glass. Confirm feasibility, handling and clearance in the positions the packer expects. Hold if the shape or application remains unresolved. |
| A layout that can sit at more than one angular position | Review the complete bottle in those positions. Confirm the approved information is accessible and the combined branding still works. Record what range is acceptable. |
A clear label can leave glass visible while its material still covers the moulded relief. If your intention is to leave the feature physically uncovered, mark that requirement on the outline. A transparent image in a proof does not describe the delivered shape. Where an actual opening is proposed, the printer needs a retained-material drawing and a confirmed supply format before pricing it as a finished piece.
The smaller label may simplify the contour while putting more demand on precise placement. A more generous open region might tolerate a wider placement range but take useful space from the information panel. Compare those effects with the actual approved copy. If none of the options carries it legibly, revisit the layout or bottle with the responsible packaging reviewer before approving artwork.
Ask how each bottle reaches the labelling position
Send the packer the marked bottle and drawing. Ask what feature it will use to orient the container and how that reference relates to the planned label edge or centerline. A round bottle standing upright has a height reference, but the required front still has to be presented to the label at the right angular position.
Keep the packer’s answer in the project record. It might describe a manual positioning method, an existing locating feature, or a trial needed on the line. The printer can prepare the requested label format once the supply requirements are confirmed. The packer needs to own the application method and show which placement it can reproduce with the proposed bottle and label. Record any unresolved equipment requirement before treating a digital proof as a production release.
For a hand-applied trial, use the handling method intended for that trial and judge several representative placements against the same drawing. For the machine order, arrange the corresponding line review. Decide with the packer which specimens and observations represent the planned work. The acceptance record should state how much clearance and angular movement the brand reviewer accepts, using criteria agreed for this project.
Review a complete specimen before release
Use an identified printed specimen on the offered construction and the intended bottle. View it straight on to compare the centerlines, then turn it to inspect the label edges and the exposed glass feature. Check that the approved information still sits in a usable reading area. Record the bottle revision, dieline, artwork, construction and application method together.
If the representative application misses the intended position, return to the component or process that needs changing. A revised outline may give more room, an independent layout may relax the angular requirement, or the packer may propose a different confirmed method. Recheck the revised combination before releasing stock against it.
Start with custom supplement bottle labels, then request a label fit and printing quote. Send a front and angled bottle photo, the marked moulded feature, usable label dimensions, approved artwork and quantity per design. Include the application method and tell us whether centering beneath the mark is essential so the proposed specimen can answer that decision.