Supplement Bottle Labels and Shrink Neck Bands: Which Goes On First?
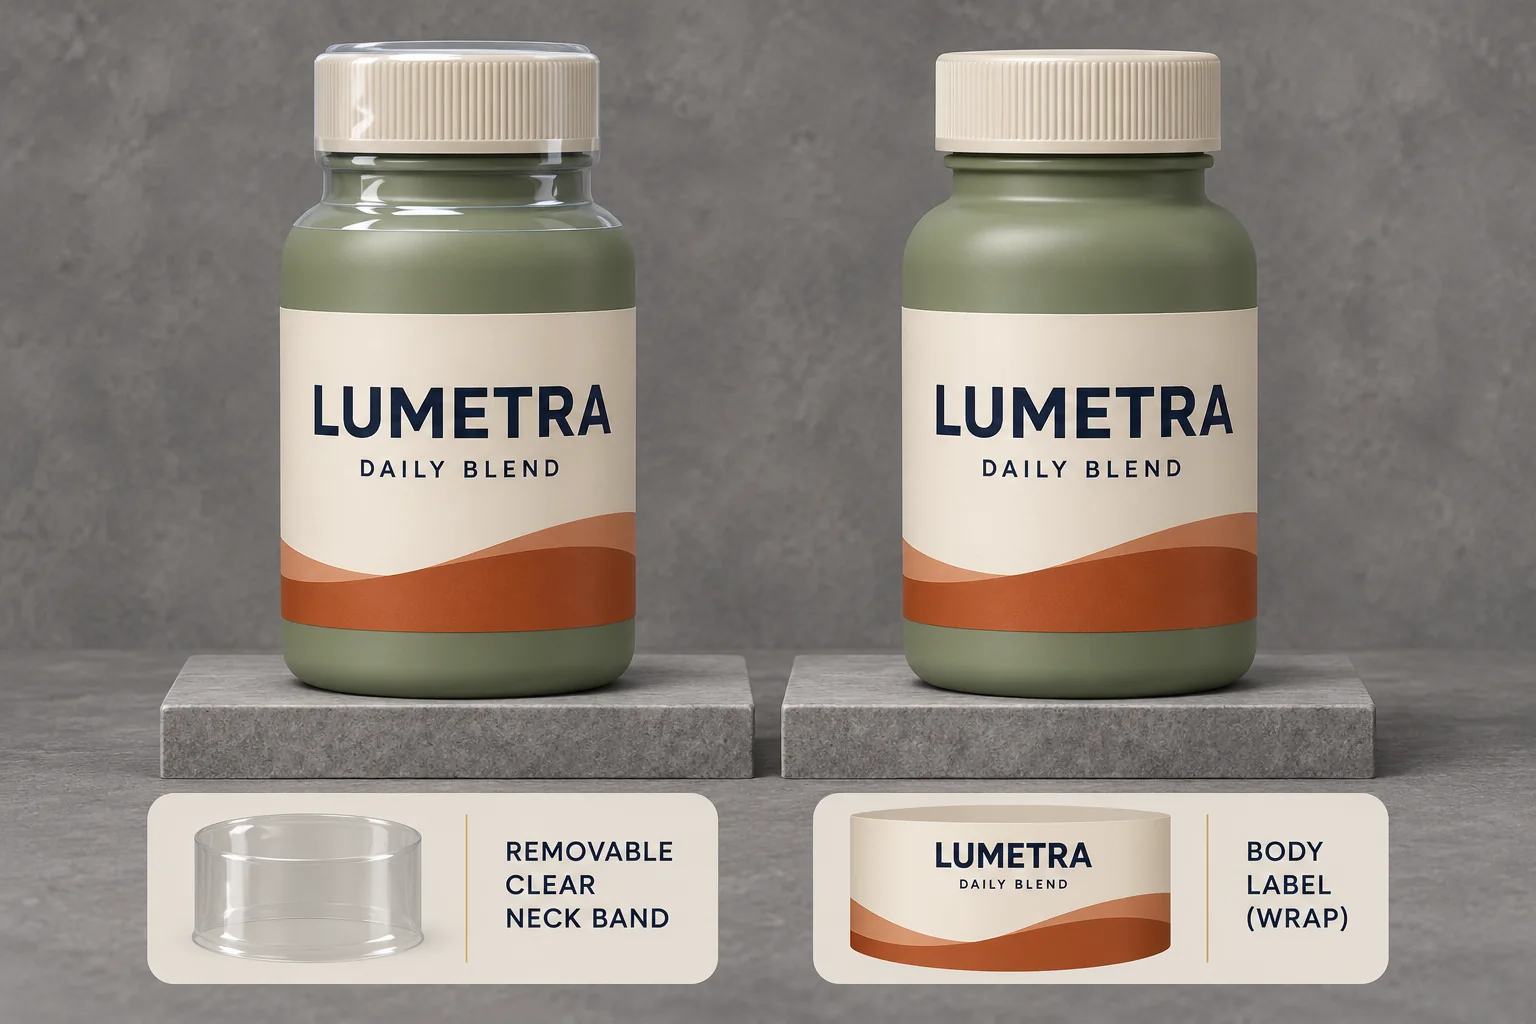
If your packer can apply the body label after the neck band has been shrunk and the bottle is ready for labelling, compare that route first. It keeps the printed body label out of the shrink step. If the existing line applies the body label first, review the exact printed label on a bottle that goes through the actual neck-banding process before approving the order. Even with a gap between the two parts, the presence of a tunnel belongs in your label brief.
The buying decision is the sequence for two separate packaging components. One identifies the bottle and carries its approved information. The other sits around the neck and cap. Each has its own review. An acceptable-looking neck band does not establish how the body label came through the line.
Put the two steps on the same packing plan
Ask the packer to mark when the bottle receives its cap, neck band and body label, and when each component is inspected. Record the bottle and closure references and the body label location. Include the band footprint after shrinking and any deliberate gap or overlap. Use the actual pack design, not dimensions inferred from a photograph. If the band can cover the upper part of the body label, mark those positions on both proofs and ask who can resolve the layout.
The Deitz neck-banding equipment sheet describes a specific heat tunnel directing heat at the band and taking the bottle to an exit for cooling. Use it as an example of why the station and sequence matter. The packer must identify the actual equipment, operating conditions and bottle presentation for your project. The sheet does not rate the proposed adhesive, inks or finish for that process.
Write down which events an applied body label would encounter in each route. If it goes on before the band, ask the packer how the production trial will represent the exposure at the bottle and the time between operations. If it goes on afterwards, ask how the packer decides that the surface is ready for labelling and how the bottle reaches that station. Either route can be reasonable when the people responsible can confirm it on the intended packaging.
Compare the choices against the real line
| Proposed sequence | Evidence to retain before release |
|---|---|
| Body label first, then shrink the neck band | An identified finished label applied on the intended bottle and run through the agreed banding and cooling sequence. Inspect it before the tunnel and after cooling. |
| Shrink the neck band first, then apply the body label | A representative banded bottle at the body labelling station. Review surface readiness, bottle handling, placement and clearance at the intended speed and process. |
| The two components overlap or touch | A marked drawing and an assembled specimen showing the contact area, the reading area and the result after opening or normal handling, as appropriate. |
| The packer has not confirmed a viable sequence | Hold the bulk label order. Ask which sequence can be trialled and which bottle, band and label specimens are required for that review. |
Compare the complete pack and production work. Changing the order of the steps may require a different point of application, a different supplier handoff or extra handling. Changing the body label may require a different construction or proof. Include any confirmed changes to cost, minimum quantities and approval lead time in the comparison. An attractive flat proof does not tell the buyer which route the packer can run.
Inspect a labelled bottle before and after its relevant step
For the label-first route, work with the packer to keep an identified control specimen from the same label construction and bottle batch. Record how the applied label looks before shrink processing. Compare it with a representative specimen after the intended process and cooling. Check the edges and seam, print appearance, legibility, surface feel and any code evidence the receiver has asked for. An edge lift already visible before processing belongs in the record alongside any change observed after it.
For the band-first route, check the bottle where it will actually be labelled. Record how long it takes to reach that point and what surface condition the packer observes there. Review application and clearance around the band, then inspect the label after the agreed handling or dwell period. If a proposed stock looks good immediately but changes later, retain the comparison and ask the converter and packer to review what changed. The specimen should represent the offered adhesive, face material, print and finish.
Avoid writing a standard tunnel setting or a universal temperature limit into the order. Ask for the relevant process conditions and acceptance criteria to be confirmed by the people who run and approve the line. If an appearance or opening requirement fails, agree the change and review it on an identified new specimen before committing to bulk printing.
For required opening evidence, use the closure-seal evidence guide to define what someone should observe on the actual closure. The body label and the band may share a package approval record, with each component retaining its own requirement and evidence.
Request a body label proposal for the approved sequence
Review custom supplement bottle labels, then request a body label and sample quote with the bottle reference, intended body label area, quantity per design and a short description of the packer’s sequence. Show where the band stops and say whether the label passes through the shrink process. Ask which offered construction and representative label could be used in the packer’s trial.